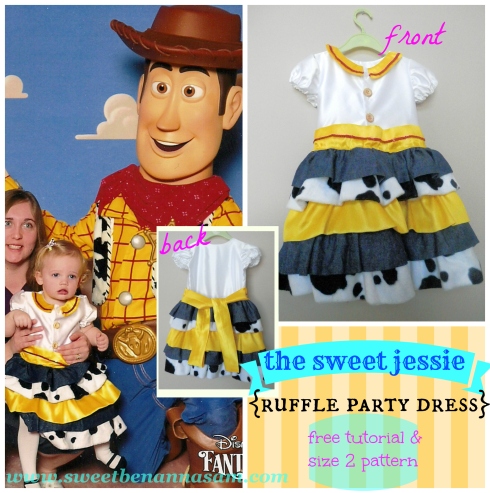

Well this is it, the grand finale of my Disney fun month! I hope you have enjoyed the Disney themed posts these past four weeks. This may be the end of “Disney Fun Month” but I can promise you this is not the end of Disney related posts on Sweet Benanna & Sam (hint: I am already working on some awesome sewing projects that are Cinderella and Tiana related…)
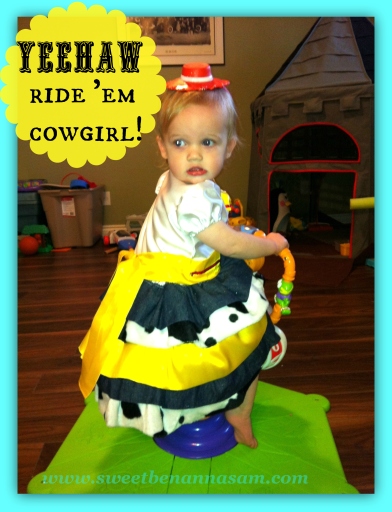
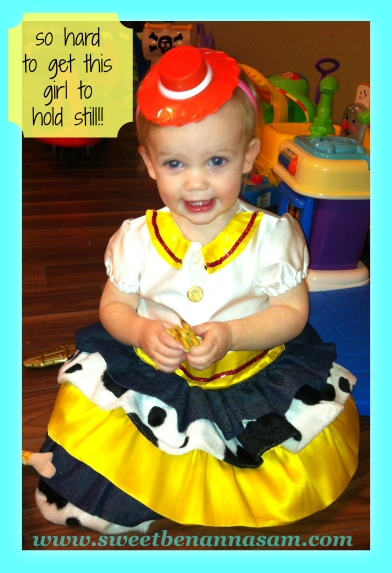
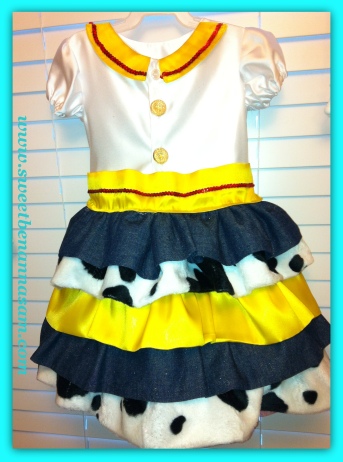
For the grand finale I am bringing you “The Sweet Jessie” ruffle party dress. I think Jessie gets the short end of the stick when it comes to girl Disney characters. She’s not glamorous like a princess and I think because of this she isn’t as popular with the girls. I (for one) think Jessie is a great character. She’s strong and brave, and just a little stubborn. She also has her romantic side too. I like to think that if Jessie were invited to a princess ball that she might wear something like this ruffle party dress. Fancy satin mixed with sparkly denim and cow print – so much fun! In this tutorial you will find a free pattern to make a size 2 dress. I hope you enjoy it – and if you don’t want to go with the Jessie theme, this dress is still beautiful with “normal” fabric { eg. no cow print or denim}.
Okay, enough with the cute pictures, let’s get to work!
—————————————————————————————————————————————
~Pattern: Please click on all three of these separate links and print each one: Jessie Front Bodice (Size 2), Jessie Back Bodice (size 2), Jessie Sleeves& Collar
~1 yard white satin material
~1/2 yard cow print – you could use faux animal fur material, minky, or even a cotton cow print.
~1/2 yard denim – I found a nice sparkle denim in the bargain section of our local fabric store
~1/2 yard yellow/gold colored satin
~ 15″ of 1/4″ elastic
~3 buttons (I used some gold-looking buttons)
~ scraps of red sequins (optional)
~thread and basic sewing supplies/sewing machine & Fabri-tac (fabric glue)
————————————————————————————————————————————————————————————————————–
After you have printed your pattern, cut all pieces as indicated. I used white satin fabric for all of the bodice pieces except for the collar, I used the yellow satin for that.
In addition to the bodice pieces you will need to cut the following:
For the skirt~ 12″ long x 42″ wide (42″ was the length of my fabric) in white satin
For the sash~ 4 1/2″x 60″ in yellow/gold satin
For the ruffles~ 7″ x 60″ you will need five of these – two in denim, two in cow print, one in yellow/gold satin
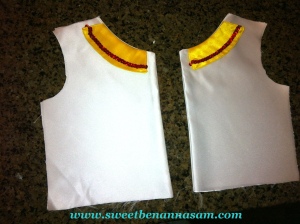
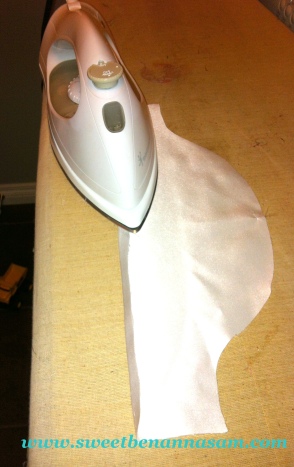
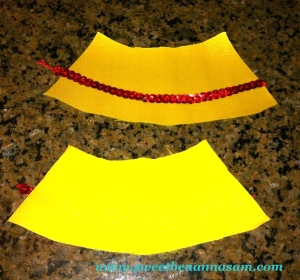 Let’s work on the collar first. Take two of your opposite. If you would like to dress them up with some red sequins, I put a line of fabric lengthwise about 1 inch from the bottom of the collar, following the curve of the collar. Then I put my strip of sequins on top, waited until it dried and sewed it in place. The sequins are optional though so it’s up to you! Next take a piece of collar without sequins and pin it on top of one of your first collar pieces, right sides together. You will sew around three sides – the short sides and the bottom with 1/4″ seam allowance. Leaves the top open, clip any curves and turn it right side out. Press it nice and flat with your iron; repeat with the second collar piece.
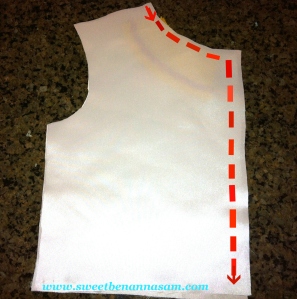
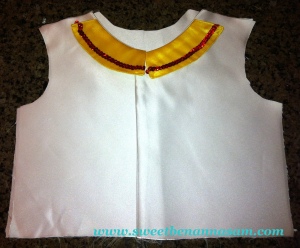
Next you are going to take one of your front bodice pieces (there should be four; two are for the lining) Place one of your 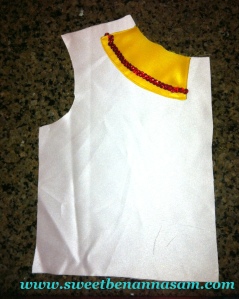 collar pieces along the neckline. One end of the collar should be about 1/2″ from the shoulder, and the other edge should be 1″ from the centre of your bodice. (The collar in my picture is a bit smaller than yours will be, I revised the pattern slightly after making the dress). Take another one of your opposite front bodice pieces (the lining) and pin it on top, right sides together. Your collar should be sandwiched in the middle. Starting at the edge of the shoulder, sew down along your collar and the centre edge of the bodice with 1/2″ seam allowance. Repeat this step for the other side of your front bodice.
Clip around any curves and turn your front bodice right side out. Press nicely with your iron. You should now have something like this:
———————————————————————————————————————————————————————————————————
Are we ready to move on and attach the back of the bodice? Good, let’s go. Take one of your back bodice pieces and place it right side up. Next lay your front bodice pieces on top, also right side facing up. Make sure the arm holes and sides of the bodice are lined up with the back piece. The centre pieces of the front bodice should over lap by about 3/4″, this will be where the buttons are added. The collar edges should just be touching.
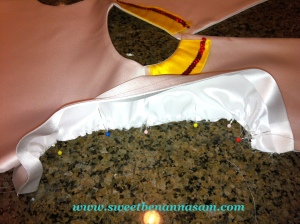
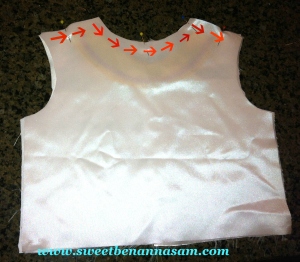
Grab your second back bodice piece and pin it along the shoulders and the neckline of the other back bodice piece, right sides together. Your front bodice should be sandwiched in between. Sew along the shoulders and the neckline BE VERY CAREFUL not to sew in the edge of the collar. Sew with 1/2″ seam, clip the curves, turn right side out and press.
 —————————————————————————————————————————————————————————————————
Time to work on the sleeves! Take your two sleeve pieces to the iron. Fold the long straight bottom edge over 1/4″ to the wrong side and press with your iron. Next fold it over another 1/2″ and press again.
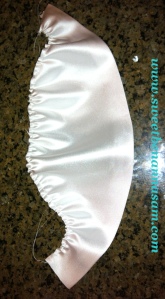 Sew a gathering stitch along the top of the sleeve, to do this set your machine at a high tension and the stitch length at 4. Repeat with the second sleeve. Take your bodice and open it; lay it flat with the front facing up. Pin one of your sleeves along the armhole, right sides together. Make sure that your gathered sleeve is the same length as the arm hole, if not adjust it by either pulling on the thread or loosening it slightly. I like to start pinning by finding the centre of the sleeve and pinning that to the shoulder seam.
Sew the sleeve to the bodice with a 1/2″ seam allowance. Repeat these same steps to attach the other sleeve.
——————————————————————————————————————————————————————————————–
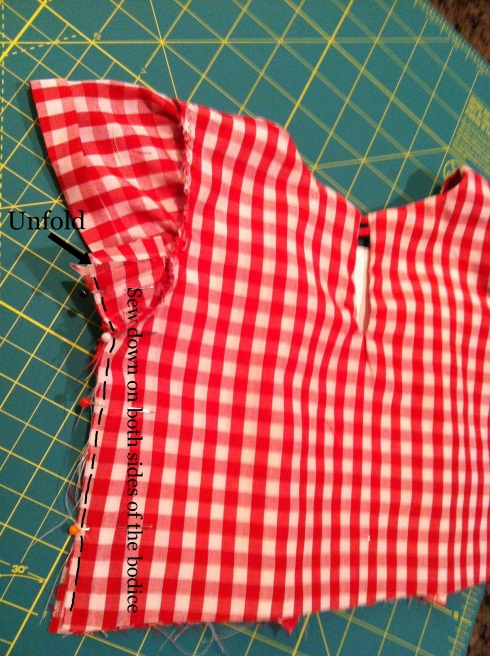
This next step is probably the trickiest one. I am going to use a picture from one of my previous tutorials because it illustrates it perfectly. Fold your bodice so that the front and back are facing each other and the lining is facing outwards. Pin the bodice along the sides and pin the sleeves together along the bottom. If you have done it correctly, the sleeves should be pinned right sides together, and wrong sides facing out. Unfold the edge of the sleeve that you had previously ironed over. Sew all the way up the side and up the sleeve with 1/2″ seam allowance. Finish your seam with a zig-zag stitch to prevent fraying.
Hopefully that wasn’t too confusing! Repeat this step on the other side. Now you are going to the “hem” on your sleeves. Fold your sleeve back the way it was, sew around the top edge of the folded part to create a casing for your elastic. Leave about 1″ open at the bottom of the sleeve to thread your elastic through. Cut your 1/4″ elastic to 7 1/2″ long. Thread it through the casing. Sew the hole shut and repeat steps for the second sleeve.
The last step to complete your bodice is to add the button holes and buttons to the front. I used three buttons, it is up to you how many and what size buttons you would like to use.
—————————————————————————————————————————————————————————————————————
Let’s get that skirt put together, shall we?
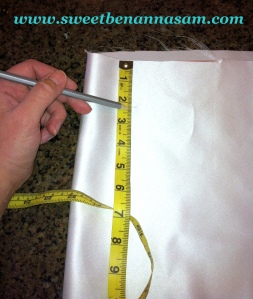
Fold your skirt piece (12″x42″) in half width-wise, right sides together. Sew down the long edge with 1/2″ seam, finish the seam with a zig-zag stitch. Now we need to hem the skirt. Fold up the bottom edge 1/4″ to the wrong side and press, fold again another 1/4″ and press again. Sew down your hem. We now need to mark on the skirt where the ruffle strips are going to go. The first strip will be at the top of the skirt so you don’t need to measure that. Measure 2 1/4″ down from the top of the skirt and make a mark with a pencil. Make several marks around the skirt, all measuring 2 1/4″ from the top. Next move down another 2 1/4″ from those marks and repeat, making marks around the skirt at this measurement. Repeat this step two more times – you should have 4 sets of pencil markings 2 1/4″ apart.
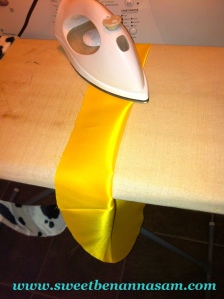 Prepare your ruffle strips – you may have had to sew more than one piece of fabric to get your 60″ in length, that is fine. Fold your ruffle strip in half so that the short ends are right side together. Sew the ends together with 1/2″ seam. Don’t worry about finishing these ends with a zig-zag stitch since they won’t be visible. Now you have a large circle. Fold up the bottom half of the circle so that the two raw edges are aligned and the right sides are facing out. Press your ruffle in half with your iron. Sew the top raw edges of the ruffle together with a zig-zag stitch to prevent fraying. Do this with all five of your ruffle strips. Lastly you need to sew a gathering stitch around the top of your ruffle. Sew it just below the zig-zag stitch. With the heavier fabrics like the denim or cow print you will either need to be very careful when pulling the thread to gather it (it may break), or maybe use a heavier thread like an upholstery thread.
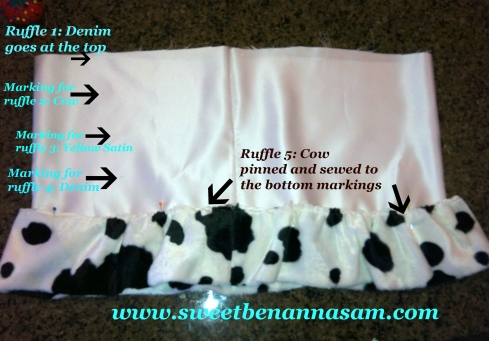
Let’s get those ruffles attached to the skirt. So there are five ruffles, starting from the top of the skirt here is how I organized it: Ruffle 1: Denim, Ruffle 2: Cow, Ruffle 3: Yellow/Gold, Ruffle 4: Denim, Ruffle 5: Cow.
We are going to start at the bottom of the skirt with Ruffle 5: Cow. Take one of your cow ruffles and make sure it is gathered to the same width as the skirt. Line up the top edge of the ruffle with the bottom markings on your skirt and pin it all the way around. Sew it into place along the top edge – that’s it, super easy! Repeat this step with Ruffle 4: Denim, placing the top edge along the markings above Ruffle 5. The bottom edge of ruffle should cover the top edge of ruffle 5 so that you don’t see the stitching. Repeat this step until all 5 layers are sewn into place. Ruffle 1 will be sewn onto the top edge of the skirt. See picture below.
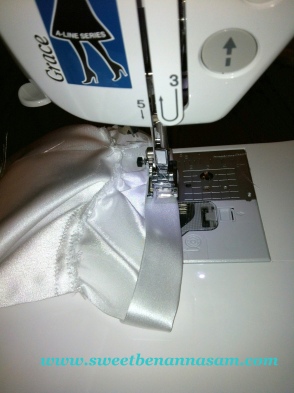
Sew a gathering stitch along the top edge of the skirt. Now it is time to sew the skirt to the bodice. Turn your skirt inside out. Make sure that your bodice is right side out and that the buttons are done up. Pin the top edge of the skirt to the bottom edge of the bodice, right sides together. Make sure that your skirt is gathered to the same size as your bodice. Also it looks much better if the seam of your skirt is at the back, centre, of the bodice. Sew the skirt to the bodice with 1/2″ seam allowance. Be careful to catch all the layers of the fabric; especially the denim so that none of the raw edges will show when you turn your dress right side out. Almost done! We just need to create the sash. I apparently forgot to take pictures of this step but it’s very easy!
Take your piece of yellow satin fabric that is 4 1/2″ x 60″ (if you have had to sew more than one piece of fabric together to get this length, that is fine BUT make sure that your seam is not near the centre of the sash or else it will be visible). With right sides together, sew the long edges of your sash with 1/4″ seam. Turn right side out and press it flat with your iron. Tuck the short open edges inside the sash and then sew it shut by top stitching along the edge. Hand stitch the sash to the dress at each of the side seams of the bodice. And that’s about it! I did add some red sequins to the front of the sash as well, I’m not sure if I was happy with them but I will leave that up to you!
Now your sweet Jessie is ready to party! I hope you have enjoyed this sewing tutorial, I would love to see your own Sweet Jessie creations! Thank you for stopping by.

